
This guide will teach you to Set a Static IP Address on Ubuntu 24.04 Via GUI. As may know, there are two main types of IP Addresses: Dynamic and Static. The Dynamic IP is automatically assigned to a device by a DHCP server. However, if you don’t have a DHCP server, you can manually configure an IP address which is a Static IP address.
In this guide, you will learn how to configure a static IP on your Ubuntu 24.04 using the graphical user interface (GUI). Let’s the process of configuring a static IP address on your Ubuntu system.
Steps To Set a Static IP Address on Ubuntu 24.04 Via GUI
Before you start to configure static IP address, you must log in to your server as a root or non-root user with sudo privileges. Then, follow the steps below to manually configure ip address on Ubuntu 2404.
Manually Set an IP Address on Ubuntu 24.04
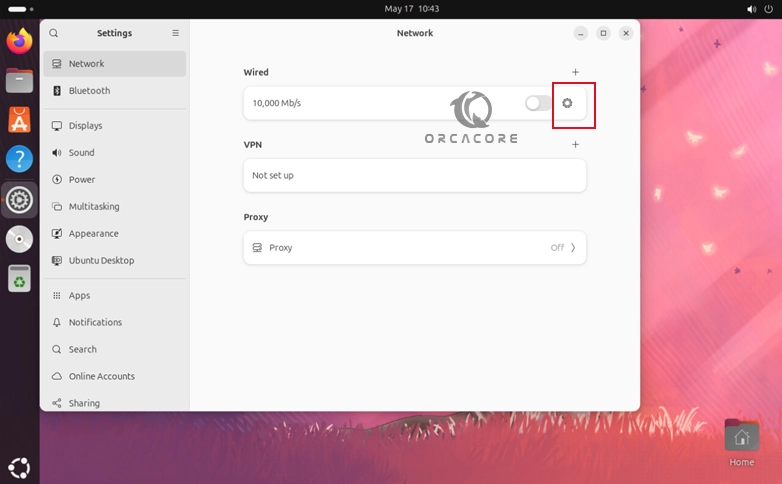
From your Ubuntu desktop, click on the Power icon in the left corner of the top screen. Then, click on wired.
From the Wired Connections, you must click on Wired Settings on Ubuntu 22.04. Next, click on the Settings icon next to the wired option.
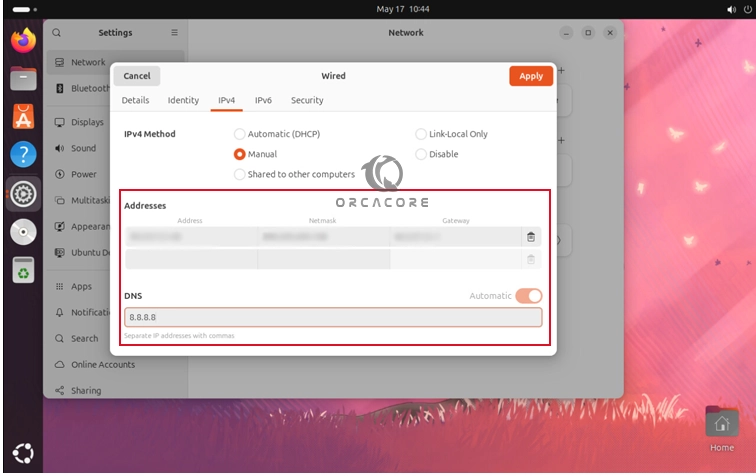
A new window will open for you. From there, navigate to the IPv4 tab and select the Manual option. Now you must enter your address, netmask, gateway, and DNS details. Finally, click on Apply.
That’s it, you are done. You should see that your wire is connected successfully. As you can see, you can manually set an ip address on Ubuntu 2204 in just a few simple steps.
The stability of Static IP is essential for services that require consistent access, such as web servers, email servers, and network printers. With a static IP, you can be sure about reliable access to these services without worrying about IP address changes that interrupt your communications.
Conclusion
Configuring a static IP address using the graphical user interface (GUI) is a straightforward process on Ubuntu 24.04. By setting a static IP, you can increase the reliability and accessibility of network services, such as web servers, printers, and other essential things.
By following these guide steps, you can ensure that your Ubuntu 24.04 system has a stable and consistent IP address. It provides reliable network communication and service delivery. Whether you are an advanced user or a beginner user, understanding how to set a static IP using the GUI method is a useful skill that can increase your network management capabilities.
Note: If you are looking for a command line option instead of a GUI, you can easily use the nmcli and Netplan command line tools. For this purpose, you can check this guide and see the guide steps for configuring your IP from the command line.
How to Set a Static IP in Ubuntu Gnome?
In the Ubuntu Gnome desktop, you can simply use the above steps to set static IP. You just need to open network settings, navigate to the IPv4 tab, and enter the details including Address, Netmask, Gateway, and DNS. You can also add multiple DNS servers by separating them with commas.
Then, click the Apply or Save button to apply the new settings. You may need to restart the network interface or your computer for the changes to take effect.
By doing these steps, you can easily set your static IP. Hope you enjoy using it.
Also, you may like to read the following articles:
4 Linux Commands to Get Public IP Address
Install ionCube Loader on Ubuntu 22.04
How To Install and Configure XAMPP on Debian 11